Preparation
Make sure your hands are CLEAN and DRY. Remove any metal rings, watches or bracelets you may be wearing. Touch the metal casing to eliminate any static charge, then unplug the computer from the electrical outlet. You can also use an antistatic wrist strap if you prefer.
Open the Case
Check the user’s manual, if necessary, to determine how to open your particular PC case. Most cases have a latch or sometimes they are held in by 2 screws.
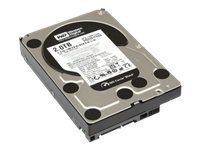
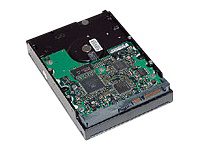
Once inside, let’s identify the Hard Drive we want to remove before donating the computer.
Here are a couple photos to help you identify your hard drive.
Disconnect the Hard Drive
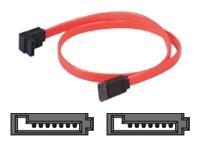
Next, let’s disconnect the hard drive. Unplug the hard drive from the Wide and flat IDE ribbon cable (or thin and compact SATA cable) and power cables. Grab the plastic IDE/SATA cable connector with your thumb and forefinger, and gently pull until the connector breaks free from the drive. The power cable can be difficult to remove if the connector is fitted tightly. Pull straight out to make sure you don’t bend any of the pins when disconnecting the cables.
Here’s a photo of the connector cable you will have to remove from the hard drive…
Remove the Hard Drive
The Final Step is to remove the hard drive. If the hard drive is fitted in a metal cage, locate and remove the screws that are holding the cage in place. Hold your hand under the cage to catch it if necessary. Once the cage is free, remove the small screws on either side of the hard drive to remove it from the cage. If the hard drive is connected directly to the computer case, simply remove the screws on each side of the hard drive and slide it out of the case. If you see a plastic light blue caddy on each side of the drive (as commonly found in Dell PC’s) squeeze both ends of the blue rails towards each other, and then at the same time, pull away from the the case and the drive should slide out. If it is an HP PC, then it may have a green plastic tab that must be lifted to let the drive slide out from the drive cage. HP’s Hard Drives usually only have one tab to lift for the drive to become free to slide out.
Other Suggestions
We suggest smashing the hard drive you removed with a hammer until the internal parts are broken. This takes a LOT of force to do. This will ensure no one else can copy your data off of the disks inside.
If the old computer is still usable, consider donating it to a non-profit for them to repurpose it for someone that needs it.
If the computer isn’t usable then take it to your local recycling center.
Thanks for doing your part!